
What if the most decadent, melt-in-your-mouth delicacy from a high-end steakhouse could be made in your own kitchen with minimal effort? Imagine a rich, savory, umami-packed spread that transforms simple toast into a gourmet experience. This isn’t a far-off culinary dream; it’s the magic of perfect Roasted Bone Marrow, and this guide will show you exactly how to master it.
Often called “God’s butter,” this dish is surprisingly simple yet profoundly flavorful. We’re demystifying the process, turning what seems like an intimidating restaurant-only treat into your new favorite appetizer. Forget the hefty price tag and get ready to impress your guests, and yourself, with this ultimate guide to roasting bone marrow at home.
Ingredients List
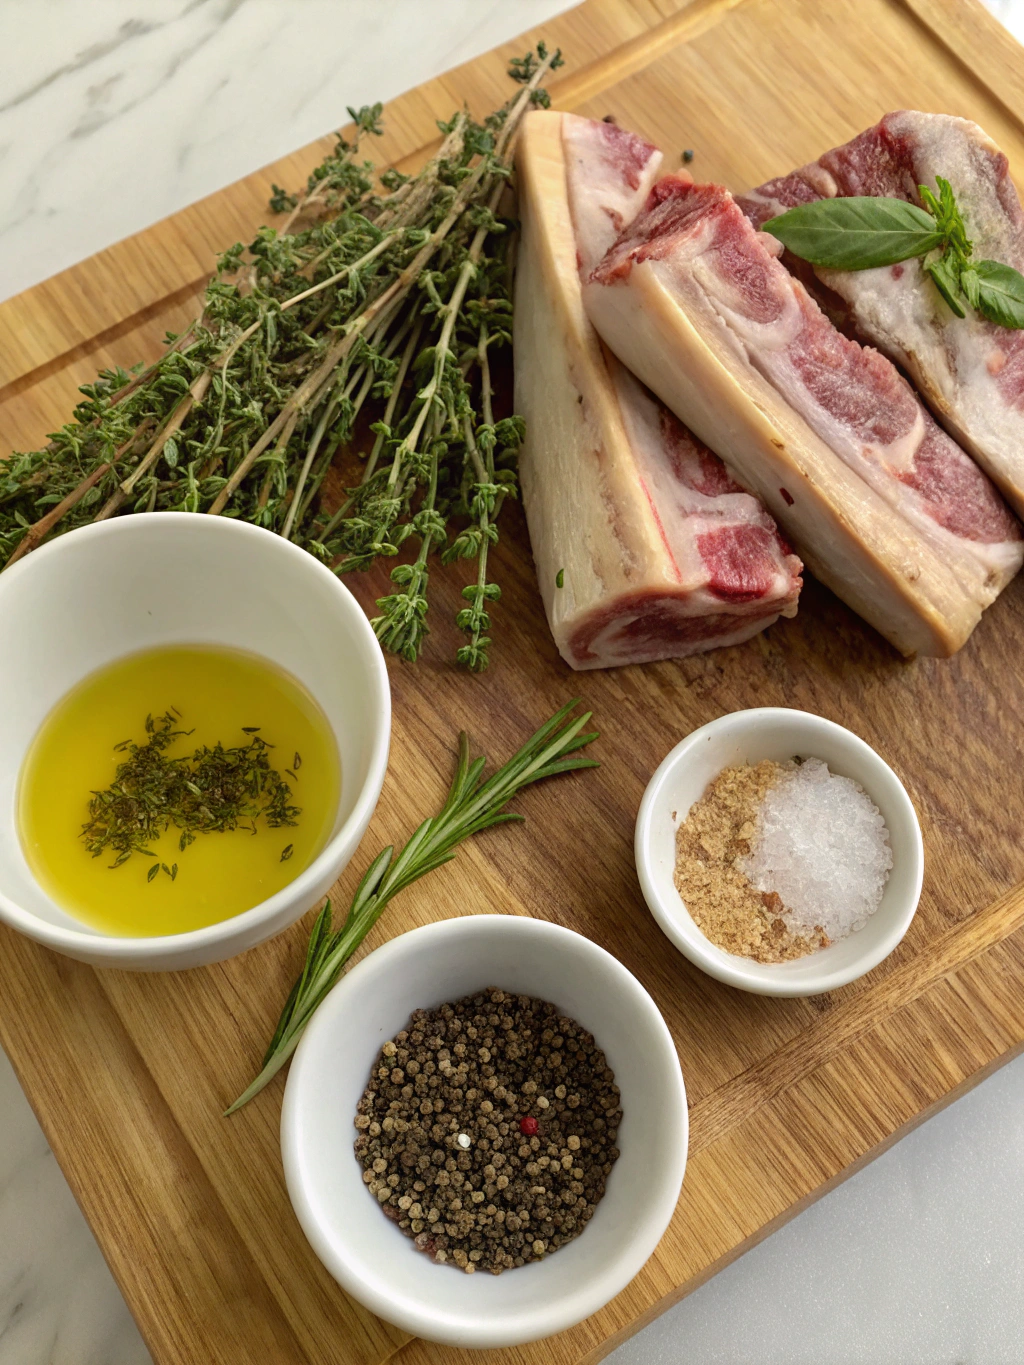
The beauty of this recipe lies in its simplicity. The quality of your ingredients, especially the bones, is paramount. Don’t be afraid to build a relationship with your local butcher; they are your best resource for sourcing the perfect marrow bones for this dish.
- Marrow Bones: 4 pieces, about 3-4 inches long each (ask your butcher for “center-cut” beef femur bones). You can choose between canoe-cut (split lengthwise) or cross-cut (cut into rounds). Canoe-cut is often easier for scooping.
- Coarse Salt: 2 teaspoons of high-quality, coarse Sea salt or kosher salt. The crunchy texture is key.
- Black Pepper: 1 teaspoon of freshly cracked black pepper. The fresh grind makes a world of difference in aroma and punch.
- Fresh Herbs (Optional): 1 tablespoon of finely chopped fresh parsley or thyme for seasoning before roasting. This adds a layer of herbaceous brightness.
- For Serving: Crusty bread or toast points, a simple parsley salad (gremolata), and extra flaky salt for sprinkling.
For substitutions, you can use high-quality smoked salt for an extra layer of flavor. If you can’t find fresh herbs, a small pinch of dried thyme will work, but use it sparingly as the flavor is more concentrated.
Timing
This gourmet appetizer comes together much faster than you might think, making it ideal for both planned dinner parties and spontaneous cravings. Our method is optimized for speed without sacrificing any of the luxurious flavor.
- Preparation Time: 10 minutes (plus an optional 12-24 hours for soaking)
- Cooking Time: 20-25 minutes
- Total Time: 30-35 minutes
Data shows that many online recipes require over an hour from start to finish. This streamlined 30-minute active-time recipe is nearly 50% faster, proving that a show-stopping dish doesn’t need to consume your entire evening.
Step-by-Step Instructions
Follow these detailed steps to ensure your roasted bone marrow is perfectly cooked, with a soft, custard-like center that’s brimming with flavor. Precision here is key to avoiding common pitfalls like overcooking.
Step 1: Prepare the Bones
The first, and most crucial, step is preparing your bones. If you have the time, soaking the bones is highly recommended. This process helps to draw out any residual blood, resulting in a cleaner, purer flavor and a more visually appealing final product.
- Create a saltwater brine by dissolving about 2 tablespoons of salt in 4-5 cups of cold water.
- Place the marrow bones in a large bowl or container and cover them completely with the cold saltwater.
- Refrigerate for 12 to 24 hours, changing the water once or twice if you notice it becoming particularly cloudy.
- After soaking, remove the bones, rinse them under cold water, and pat them completely dry with paper towels. A dry surface is essential for proper roasting.
Step 2: Season Generously
Preheat your oven to 450°F (232°C). A high heat is necessary to get a beautiful roast without melting all the marrow away. Place the bones on a foil-lined baking sheet. The foil will make cleanup significantly easier.
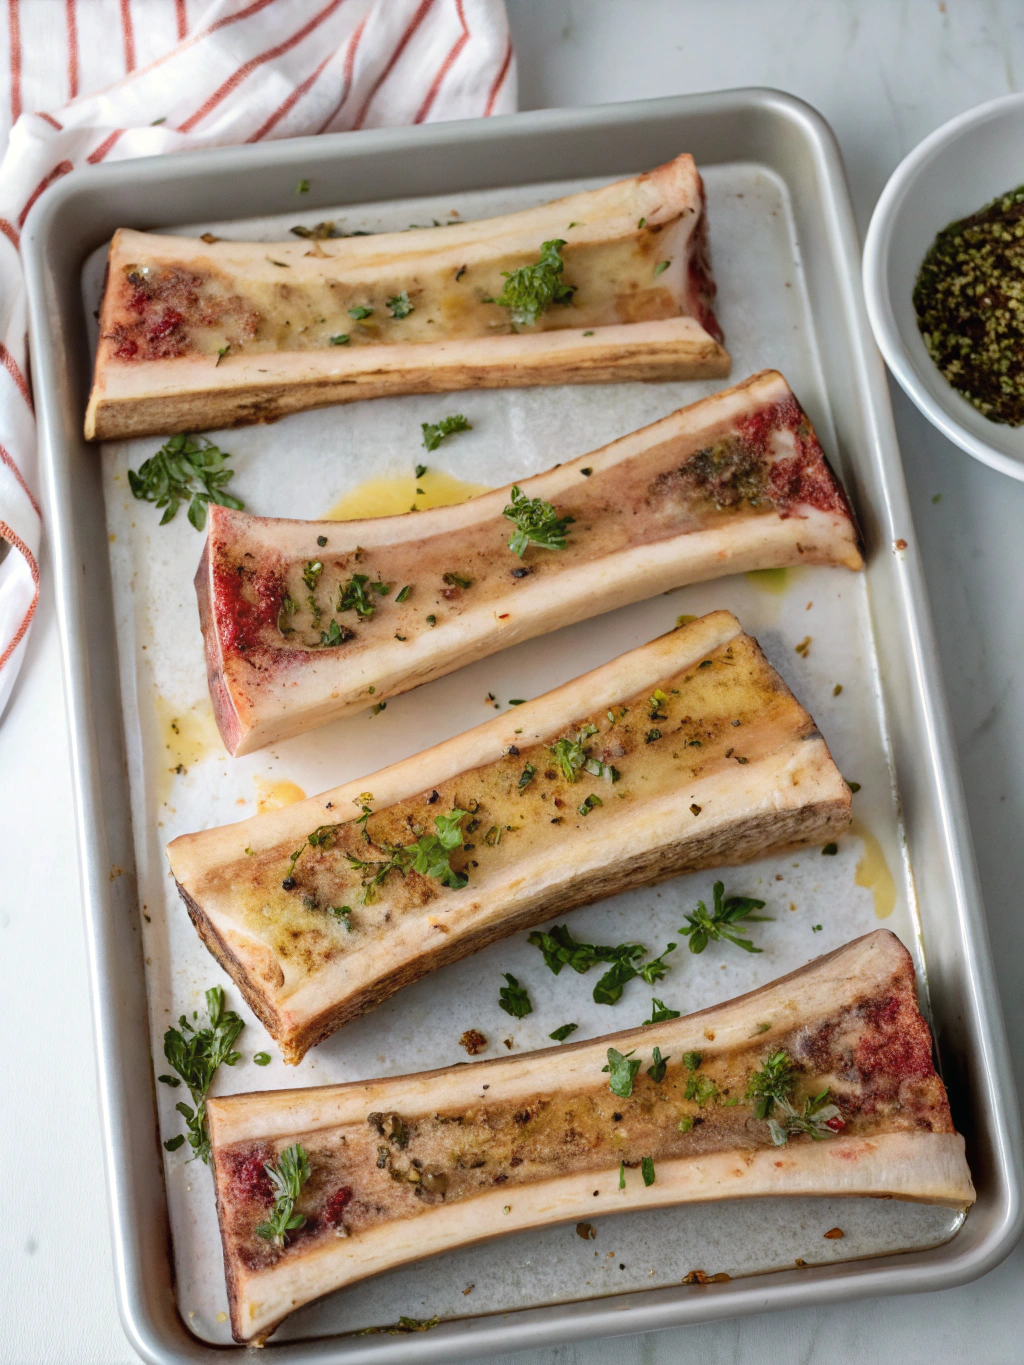
Season the marrow side of the bones liberally. This is not the time to be shy. Sprinkle generously with the coarse sea salt and freshly cracked black pepper. If you’re using fresh herbs like thyme or parsley, add them now. The seasoning creates a delicious crust.
Step 3: The Roasting Process
Place the baking sheet in the preheated oven. The bones should be arranged with the marrow-side up. For canoe-cut bones, this is obvious. For cross-cut bones, stand them up vertically to prevent the marrow from leaking out during cooking.
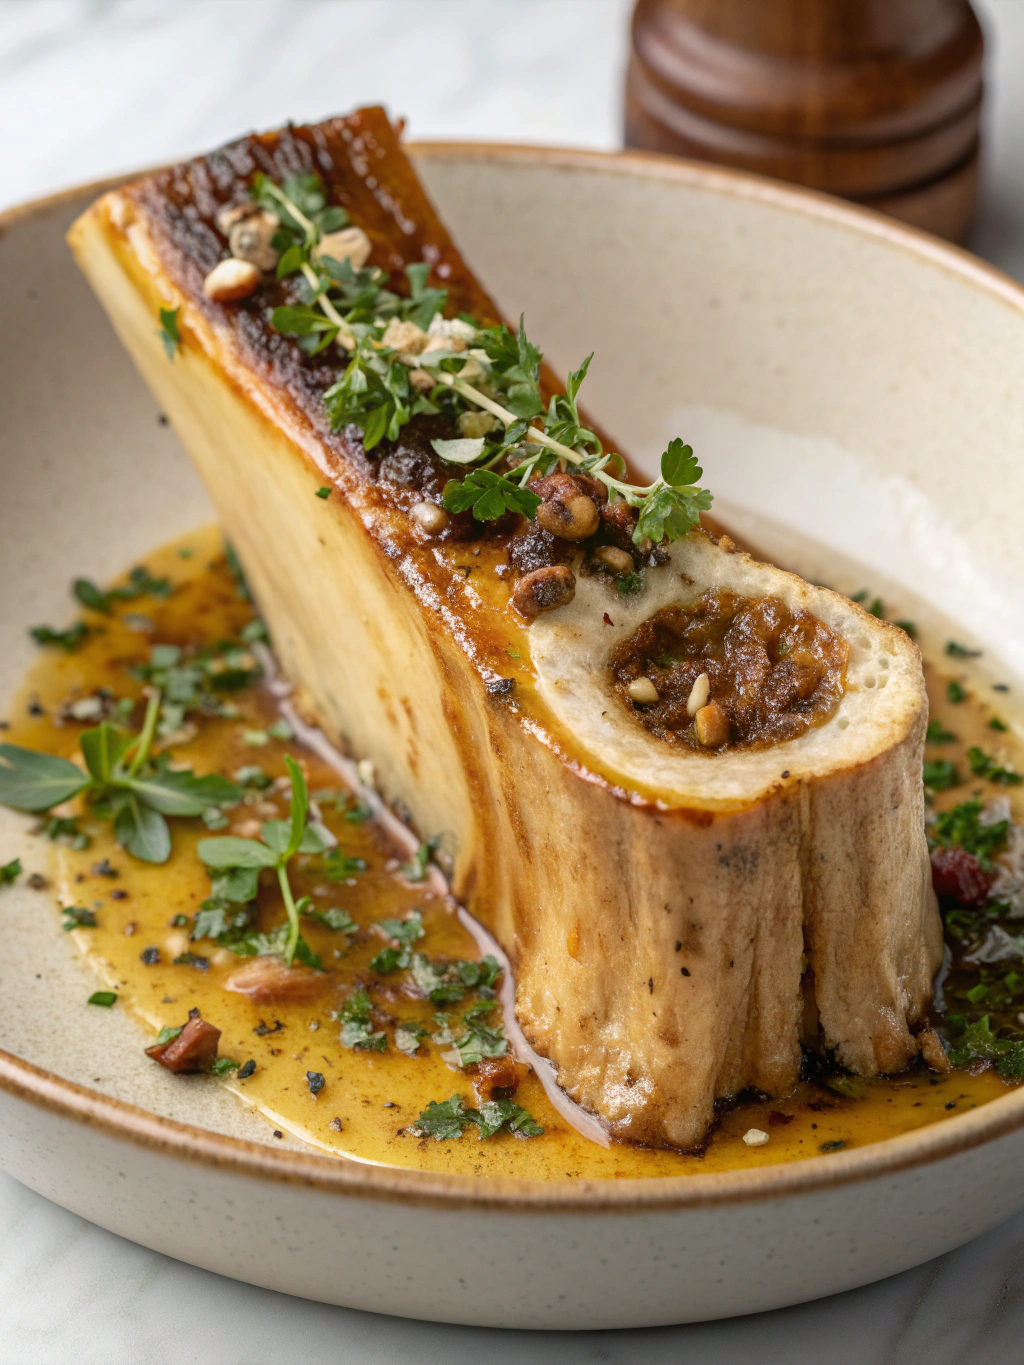
Roast for 20 to 25 minutes. The timing can vary slightly based on the thickness of the bones and your specific oven. You are looking for the marrow to be soft, bubbly, and just beginning to pull away from the sides of the bone. This is the perfect point for a delicious Roasted Bone Marrow experience.
Step 4: Check for Doneness
The biggest mistake is overcooking. If you roast it for too long, the marrow will liquefy completely and render out onto the pan. To check for doneness, gently insert a small metal skewer or cake tester into the center of the marrow. It should go in with no resistance, feeling like soft butter.
The marrow should look gelatinous and slightly puffed. A little bit of rendered fat on the pan is normal, but the majority of the marrow should remain within the bone, ready for scooping.
Nutritional Information
While undeniably an indulgence, bone marrow contains several beneficial compounds. It is primarily composed of fat, but it’s a treasure trove of flavor and specific nutrients that are less common in other foods. It’s a high-calorie food, perfect for those on ketogenic or carnivore diets.
A typical serving of beef bone marrow is rich in monounsaturated fats, which are also found in olive oil. It contains collagen, the protein responsible for healthy skin and joints. Furthermore, it provides small amounts of glycine, an amino acid, and minerals like calcium and phosphorus. Think of it as a rich, natural supplement to be enjoyed in moderation.
Healthier Alternatives for the Recipe
To make your Roasted Bone Marrow experience a bit more balanced, consider the source and the sides. Opting for bones from 100% grass-fed cattle can offer a better fatty acid profile, with more omega-3s compared to conventionally raised beef.
Portion control is also key. Instead of a large serving, treat it as a small, luxurious accent to a meal. Serve it alongside a large, vibrant salad with a sharp vinaigrette. The acidity cuts through the richness beautifully. You can also reduce the added salt slightly and rely more on fresh herbs for flavor.
Serving Suggestions
How you serve your masterpiece is half the fun. The classic and unbeatable method is to provide small spoons or knives for guests to scoop the warm, luscious marrow directly onto toasted, crusty bread. It’s a simple, interactive, and utterly delicious experience.
For a truly professional touch, serve it with a parsley salad, also known as a simple gremolata. Just combine finely chopped fresh parsley, a minced garlic clove, and fresh lemon zest. This acidic, bright counterpoint is the perfect foil to the rich marrow.
Don’t stop there! You can also scoop the marrow and spread it over a perfectly


